Hardware startups, as you move forward from brainstorming to making your project into reality, you’ll have to first plunge into the prototyping field.
The process of prototyping itself can be divided into several steps, which are different for both software and hardware prototyping. Here, we'll discuss hardware prototyping stages.
In each of the different stages, you'll construct different kinds of prototypes to create a concrete foundation for your product development.
Hardware prototyping can be divided into 3 stages with different types of prototypes:
1. Proof of Concept
The first step of prototyping is to create a proof of concept (POC). Depending on how you do your project management, one team can have one or more proof of concepts to aid with the project discussion.
Exactly like its name, the proof of concept model is made only to display the concept of the product you’re making. The model developed at this stage wouldn’t be able to stand alone, you’ll need to explain every part of the model, on how it’s describing your concepts.
A proof of concept should be designed with the aim to create a model structure for the internal team for internal goal alignment. The model should be a visualization aid for your team to understand the target project outcome.
In the process of constructing a POC, take your time to explore the potential risks and difficulties you'll be facing with your chosen technology. Analyze also the potential of the model you're making.
A POC model doesn’t need to show exactly how your product would look like or work like. It simply just has to represent the main structural features and working mechanism of your project. You can simply make your proof of concept from Lego, since they’re easy to put together and build, tweak, or dismantle.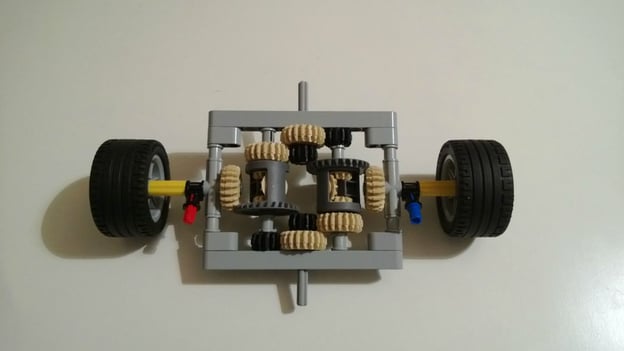
The above example shows a Lego proof-of-concept of a differential gear application with a pair of wheels. The model is able to demonstrate the functionality of the differential gears, their construction, and the rotation of the wheels to be used in the actual model (which could be a vehicle). As you move forward with your project, you’ll find yourself looking back to refer to your proof-of-concept model. This will keep you aligned with your goals, and assist you in configuring the core mechanism of your product.
2. Looks-like and Works-like Prototypes
Looks-like prototypes are also known as appearance prototypes. They are constructed to give a physical representation of how the end product should look like. Looks-like prototypes should be able to illustrate the size, shape, and key structures of the final product. They don’t necessarily need to be able to mechanically move, much less function.
Creating a looks-like prototype can be done with various materials based on your budget, time, and aesthetic target. You can make it simply by using cardboard or clay for a cheaper alternative or just as a starting point. Then, if you want to create more sophisticated parts, you could construct your product with 3D printing. Larger models and models made out of metals can be prototyped using CNC machining processes such as milling, cutting, and drilling.
A works-like prototype, on the other hand, is a prototype that is made to demonstrate the workflow of the final product. Thus, it cares very little about the appearance of the product. The works-like prototype will have to show the mechanism of its mechanical and/or electrical features, which means it needs to be constructed from several different parts.
For mechanical hardware products, material selection plays a huge role in the prototyping process. Selecting the right material combination to give the required flexibility, strength, ductility, and manufacturing capabilities will be one of the most crucial steps. It’s alright if you don’t make it right the first time, it’s normal for prototyping to take several iterations for a satisfactory outcome.
Similarly, dealing with an electrical works-like prototype will also require different factors. This involves the selection of different devices and components to create the system. Devices such as microcontroller boards, sensors, antennas, cameras, or monitors should be adjusted according to your final product’s target size, power requirements, working conditions, and budget. At this stage, you’ll also need to decide which parts are going to be sourced from off-the-shelf components, and which parts should be custom designed.
Let's run a scenario. For example, you're doing a prototype of a device very similar to Baronbrew’s Tilt Hydrometer,
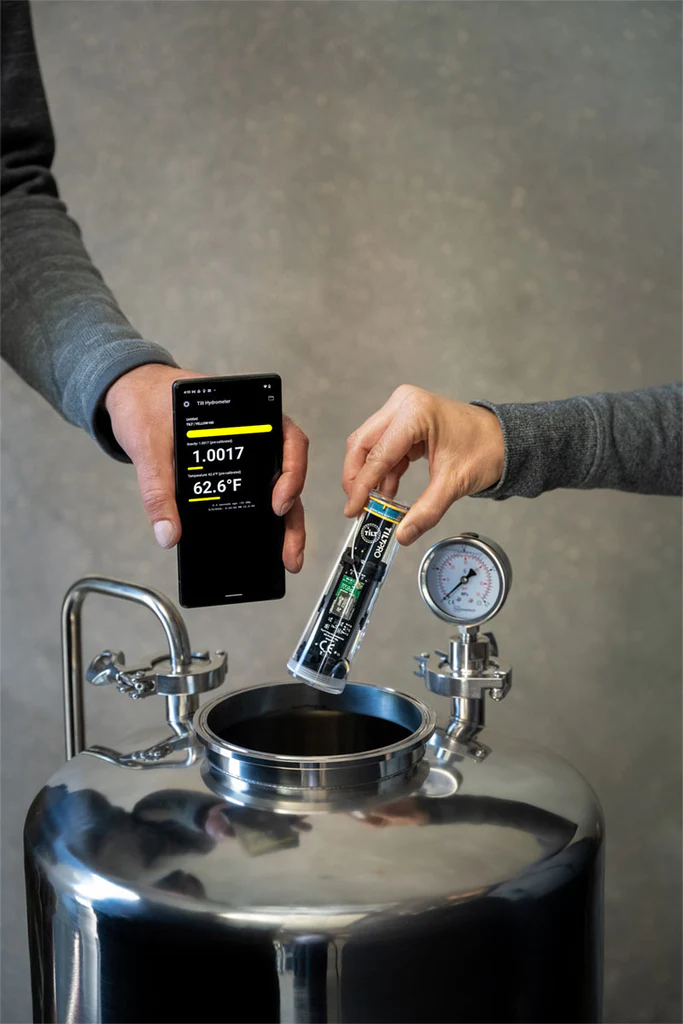
Prototyping the looks-like prototype will include the product's structural design, making sure its size and shape fit on distilling chambers. Design should also be made internally to keep the parts inside steady and waterproof. Thus, the choice of materials also a huge role in constructing a looks-like prototype.
Next, configuring the works-like prototype will involve testing how the system could convey accurate data, such as temperature and pressure, from the sensors to the user interface. At the same time, a floating mechanism to keep the device level should also be configured in the works-like prototype. The process will be a continuous iteration process, hence you might start by using development boards and sensors, before ending up with a custom-made module.
|
Looks-like |
Works-like |
|
|
Purpose |
Illustrate shape, size, and structures |
Demonstrate product workflow |
|
Components |
Generally uses custom-made parts |
Mostly uses off-the-shelf parts, with a combination of custom parts |
|
Parts |
Made from clay, cardboard, 3D printing, etc. |
Include breadboards, circuit boards, wiring, sensors, motor, etc. |
3. Engineering Prototype
The end product of the integration of a looks-like and a works-like prototype is this engineering prototype. An engineering prototype would be expected to look like your final product, except it’s going to look more unfinished and the performance might just not be as good.
The process of creating an engineering prototype, or works-like looks-like prototype, requires back-and-forth alterations. Continuous improvements should be taken to solve the problem. At times, you should compromise your functionality for the looks of your model, or compromise the aesthetics of your product for the product’s purpose.
The engineering prototype you get at the end of this prototyping process can be used as your Beta Prototype, which is the prototype you show to investors to showcase your project plan to gain more funding.
.png)
.png)
.png)
.png)